

Subdomains für
egosanto.deauf VServer Debian11-bullseye, NginX, MySQL, PHP7.1, PHP-7.4, PHP-8.1, Certbot
@authors: René Fürst und Toni Sun
@Datum: 25.07.2022
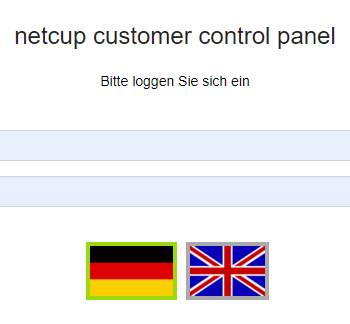
Einlogen
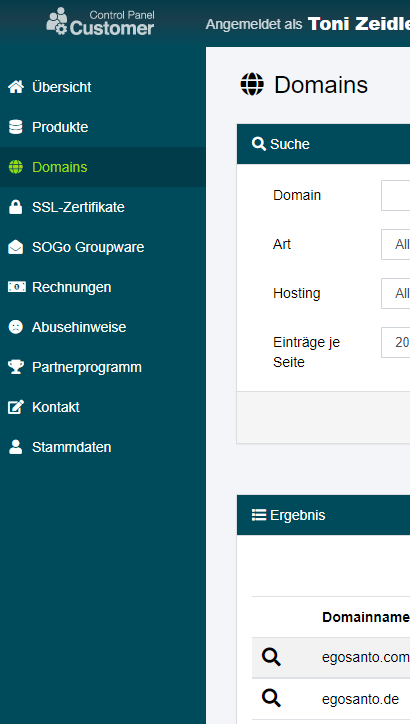
Domains->Domain auswählen(egosanto.de)->DNS
Host = 'dev'
Type = A
Destination \<Your VServer IP>
dev.egosanto.de
DNS Records speichern
OK

1. Installiere Image "Debian 11 bullseye" auf VServer''
- root Passwörter notieren.
Mit Putty unter root auf VServer anmelden.
OS aktualisieren
apt update && apt upgrade -yapt-get install software-properties-common dirmngr ca-certificates apt-transport-https nano wget curl -y
2. Installieren von NginX mit LEMP-Stack
curl -sSL https://packages.sury.org/nginx-mainline/README.txt | sudo bash -xoder
curl -sSL https://packages.sury.org/nginx/README.txt | sudo bash -xapt updateapt install nginx-core nginx-common nginx nginx-fullapt-cache policy nginxnano /etc/nginx/nginx.confbrotli on;
brotli_comp_level 6;
brotli_static on;
brotli_types application/atom+xml application/javascript application/json application/rss+xml
application/vnd.ms-fontobject application/x-font-opentype application/x-font-truetype
application/x-font-ttf application/x-javascript application/xhtml+xml application/xml
font/eot font/opentype font/otf font/truetype image/svg+xml image/vnd.microsoft.icon
image/x-icon image/x-win-bitmap text/css text/javascript text/plain text/xml;nginx -tsystemctl restart nginxnginx -s reloadsystemctl enable nginxsystemctl status nginx
3. Installation von MySQL / MariaDB-Server
curl -LsS https://downloads.mariadb.com/MariaDB/mariadb_repo_setup | bash -s -- --mariadb-server-version=10.6 --skip-maxscale --skip-toolsoder
Option 2. MariaDB 10.7-Repository importieren:
curl -LsS https://downloads.mariadb.com/MariaDB/mariadb_repo_setup | bash -s -- --mariadb-server-version=10.7 --skip-maxscale --skip-toolsapt updateapt-get install -y mariadb-server mariadb-clientmariadb --versionsystemctl status mariadbsystemctl start mariadbsystemctl stop mariadbsystemctl enable mariadbsystemctl restart mariadbMariaDB hat noch kein root PASSWORT
mysql_secure_installationmysql -uroot -pmysql> show databases;
...
exit
4. PHP Installation
curl -sSL https://packages.sury.org/php/README.txt | sudo bash -xInstallieren von PHP 7.4, 8.0 und 8.1 FPM
apt install php7.4 php7.4-fpm php7.4-cli php7.4-curl php7.4-zip php7.4-mysql -yapt install php8.0 php8.0-fpm php8.0-cli php8.0-curl php8.0-zip php8.0-mysql -yapt install php8.1 php8.1-fpm php8.1-cli php8.1-curl php8.1-zip php8.1-mysql -yNach der Installation wird der PHP-FPM-Dienst automatisch gestartet und du kannst den Status überprüfen, um sicherzustellen, dass er in Ordnung ist.
systemctl status php7.4-fpmsystemctl status php8.0-fpmsystemctl status php8.1-fpmphp --versionnano /var/www/html/info.php<?php
phpinfo();
?>rm -f /var/www/html/info.php
5. Erstelle einen Nginx-Serverblock
mkdir /etc/nginx/sites-available && mkdir /etc/nginx/sites-enablednano /etc/nginx/nginx.confinclude /etc/nginx/sites-enabled/*.conf;
server_names_hash_bucket_size 64;nano /etc/nginx/sites-available/dev.egosanto.de.conf
nano /etc/nginx/sites-available/lemp.egosanto.de.conf
nano /etc/nginx/sites-available/org.egosanto.de.conf
nano /etc/nginx/sites-available/www.egosanto.de.conf
nano /etc/nginx/sites-available/app.egosanto.de.conf
nano /etc/nginx/sites-available/jup.egosanto.de.conf
nano /etc/nginx/sites-available/java.egosanto.de.conf
nano /etc/nginx/sites-available/dbs.egosanto.de.confserver {
listen 80;
listen [::]:80;
server_name dev.egosanto.de www.dev.egosanto.de;
root /var/www/dev.egosanto.de/;
index index.php index.html index.htm;
location / {
try_files $uri $uri/ /index.php;
}
location ~ .php$ {
include snippets/fastcgi-php.conf;
fastcgi_pass unix:/run/php/php8.1-fpm.sock;
}
#Along browser cache lifetime can speed up repeat visits to your page
location ~* .(jpg|jpeg|gif|png|webp|svg|woff|woff2|ttf|css|js|ico|xml)$ {
access_log off;
log_not_found off;
expires 360d;
}
#disable access to hidden files
location ~ /.ht {
access_log off;
log_not_found off;
deny all;
}
}server {
server_name org.egosanto.de www.org.egosanto.de;
root /var/www/org.egosanto.de/;
index index.php index.html index.htm;
location / {
try_files $uri $uri/ /index.php;
}
# MarkDown files parser Parsedown.php -> see https://github.com/erusev/parsedown
location ~ .md$ {
include fastcgi.conf;
fastcgi_param SCRIPT_FILENAME $document_root/vendors/parsedown/parseMD.php;
fastcgi_pass unix:/run/php/php8.1-fpm.sock;
}
location ~ .php$ {
include snippets/fastcgi-php.conf;
fastcgi_pass unix:/run/php/php8.1-fpm.sock;
}
# A long browser cache lifetime can speed up repeat visits to your page
location ~* .(jpg|jpeg|gif|png|webp|svg|woff|woff2|ttf|css|js|ico|xml)$ {
access_log off;
log_not_found off;
expires 360d;
}
# disable access to hidden files
location ~ /.ht {
access_log off;
log_not_found off;
deny all;
}
listen [::]:443 ssl; # managed by Certbot
listen 443 ssl; # managed by Certbot
ssl_certificate /etc/letsencrypt/live/org.egosanto.de/fullchain.pem; # managed by Certbot
ssl_certificate_key /etc/letsencrypt/live/org.egosanto.de/privkey.pem; # managed by Certbot
include /etc/letsencrypt/options-ssl-nginx.conf; # managed by Certbot
ssl_dhparam /etc/letsencrypt/ssl-dhparams.pem; # managed by Certbot
add_header Strict-Transport-Security "max-age=31536000" always; # managed by Certbot
ssl_trusted_certificate /etc/letsencrypt/live/org.egosanto.de/chain.pem; # managed by Certbot
ssl_stapling on; # managed by Certbot
ssl_stapling_verify on; # managed by Certbot
}
server {
if ($host = org.egosanto.de) {
return 301 https://$host$request_uri;
} # managed by Certbot
listen 80;
listen [::]:80;
server_name org.egosanto.de www.org.egosanto.de;
root /var/www/org.egosanto.de/;
index index.php index.html index.htm;
location / {
try_files $uri $uri/ /index.php;
}
location ~ .php$ {
include snippets/fastcgi-php.conf;
fastcgi_pass unix:/run/php/php8.1-fpm.sock;
}
# A long browser cache lifetime can speed up repeat visits to your page
location ~* .(jpg|jpeg|gif|png|webp|svg|woff|woff2|ttf|css|js|ico|xml)$ {
access_log off;
log_not_found off;
expires 360d;
}
#disable access to hidden files
location ~ /.ht {
access_log off;
log_not_found off;
deny all;
}
}mkdir -p /var/www/dev.egosanto.de/
mkdir -p /var/www/lemp.egosanto.de/
mkdir -p /var/www/org.egosanto.de/
mkdir -p /var/www/www.egosanto.de/
mkdir -p /var/www/app.egosanto.de/
mkdir -p /var/www/java.egosanto.de/
mkdir -p /var/www/jup.egosanto.de/
mkdir -p /var/www/dbs.egosanto.de/$USER Variable:chown -R $USER:$USER /var/www/html/example.com/chmod -R 755 /var/wwwindex.html Datei:nano /var/www/lemp.renefuerst.eu/index.phpNginx-Serverblock aktivieren
ln -s /etc/nginx/sites-available/www.egosanto.de.conf /etc/nginx/sites-enabled/
ln -s /etc/nginx/sites-available/dev.egosanto.de.conf /etc/nginx/sites-enabled/
ln -s /etc/nginx/sites-available/org.egosanto.de.conf /etc/nginx/sites-enabled/
ln -s /etc/nginx/sites-available/lemp.egosanto.de.conf /etc/nginx/sites-enabled/
ln -s /etc/nginx/sites-available/app.egosanto.de.conf /etc/nginx/sites-enabled/
ln -s /etc/nginx/sites-available/java.egosanto.de.conf /etc/nginx/sites-enabled/
ln -s /etc/nginx/sites-available/jup.egosanto.de.conf /etc/nginx/sites-enabled/
ln -s /etc/nginx/sites-available/dbs.egosanto.de.conf /etc/nginx/sites-enabled/nginx -tÖffne als Nächstes den Internetbrowser und gib die Domain-Adresse ein (egosanto.de) um zu testen, ob der Server erreichbar ist.
6. Nginx mit dem kostenlosen SSL-Zertifikat von Let's Encrypt
- Installiere zuerst das certbot-Paket wie folgt:
apt install python3-certbot-nginx -ycertbot --nginx --agree-tos --redirect --hsts --staple-ocsp --email toni.z@gmx.de -d www.egosanto.de
certbot --nginx --agree-tos --redirect --hsts --staple-ocsp --email toni.z@gmx.de -d dev.egosanto.de
certbot --nginx --agree-tos --redirect --hsts --staple-ocsp --email toni.z@gmx.de -d lemp.egosanto.de
certbot --nginx --agree-tos --redirect --hsts --staple-ocsp --email toni.z@gmx.de -d org.egosanto.de
certbot --nginx --agree-tos --redirect --hsts --staple-ocsp --email toni.z@gmx.de -d java.egosanto.de
certbot --nginx --agree-tos --redirect --hsts --staple-ocsp --email toni.z@gmx.de -d app.egosanto.de
certbot --nginx --agree-tos --redirect --hsts --staple-ocsp --email toni.z@gmx.de -d jup.egosanto.de
certbot --nginx --agree-tos --redirect --hsts --staple-ocsp --email toni.z@gmx.de -d dbs.egosanto.deEin ideales Setup umfasst eine erzwungene HTTPS 301-Weiterleitungen, einen Strict-Transport-Security-Header und OCSP-Stapling. Passe einfach die E-Mail und den Domainnamen an deine Anforderungen an.
Jetzt lautet deine URL HTTPS://lemp.renefuerst.eu statt HTTP://lemp.renefuerst.eu.
Wenn du das alte HTTP-URL verwendest, wird es automatisch umgeleitet zu HTTPS.
ENDE
 www.egosanto.de
 dev.egosanto.de
 jup.egosanto.de
 java.egosanto.de
 org.egosanto.de
 app.egosanto.de
 dbs.egosanto.de
 lemp.egosanto.de